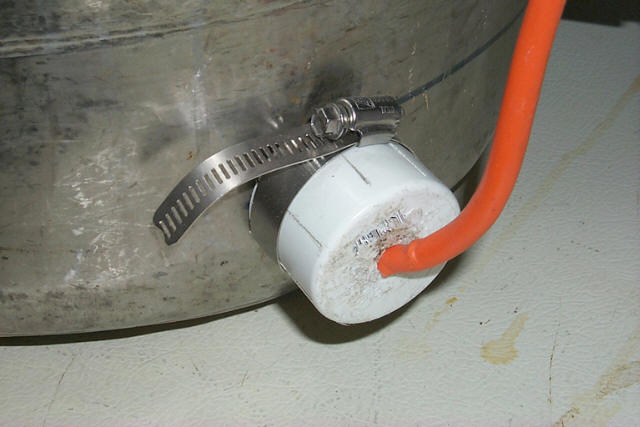
 Here
is the outside of the element with a plastic pipe cap. I cut a few slits
in the cap so it would compress down on the element
Here
is the outside of the element with a plastic pipe cap. I cut a few slits
in the cap so it would compress down on the element
Click on any picture for a larger view
Here
is the outside of the element with a plastic pipe cap. I cut a few slits
in the cap so it would compress down on the element
 The
terminals of the element
The
terminals of the element
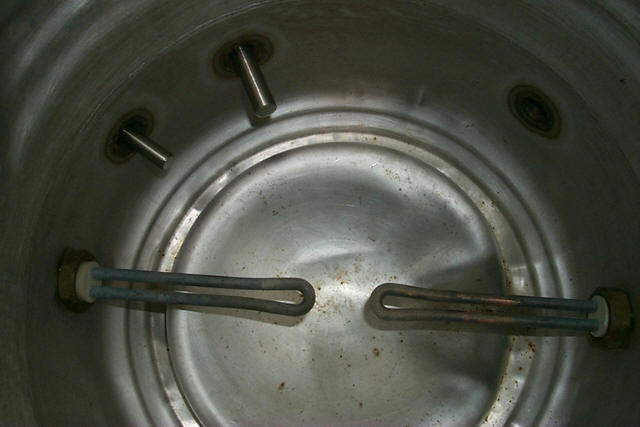 Looking
into the hlt. At 9 and 3 o'clock are the heating elements, thermostat at
10, thermometer well at 11 and the drain at 1:30.
Looking
into the hlt. At 9 and 3 o'clock are the heating elements, thermostat at
10, thermometer well at 11 and the drain at 1:30.
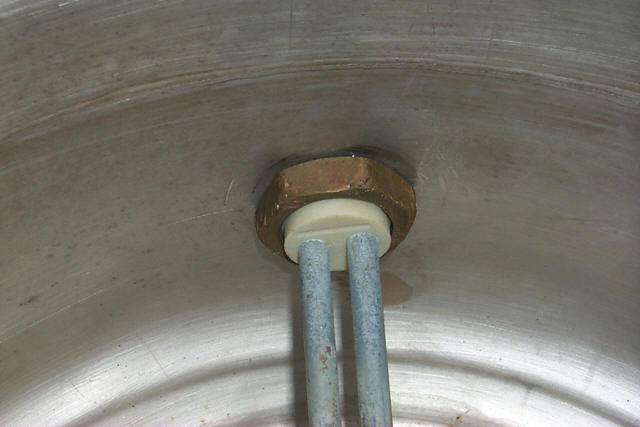 I
used a copper pipe connector to make a nut. I cut the part that slips on
to the pipe off. If I were to do it over, I'd weld stainless coupling into
the keg. The nuts are hard to get tight enough so they don't leak.
I
used a copper pipe connector to make a nut. I cut the part that slips on
to the pipe off. If I were to do it over, I'd weld stainless coupling into
the keg. The nuts are hard to get tight enough so they don't leak.
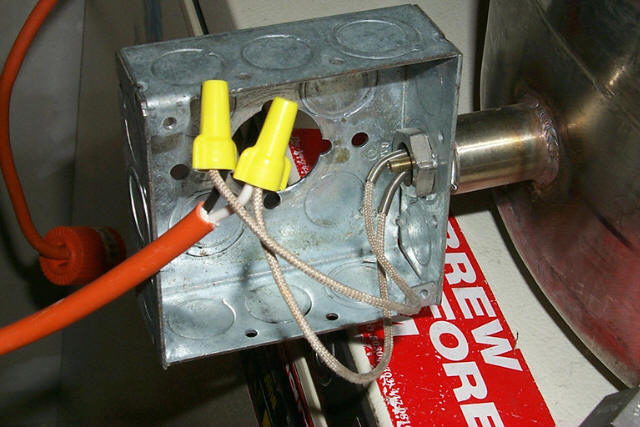 This
is the t-stat connection. I was seeing if a j-box would fit snugly. I'm
going to replace that pos with a hand box and cover. If you look closely
at the t-stat, you'll see a set screw in between the wires. That's how
the temperature is set. I usually don't change the temperature from 167°F
so access to it isn't important.
This
is the t-stat connection. I was seeing if a j-box would fit snugly. I'm
going to replace that pos with a hand box and cover. If you look closely
at the t-stat, you'll see a set screw in between the wires. That's how
the temperature is set. I usually don't change the temperature from 167°F
so access to it isn't important.
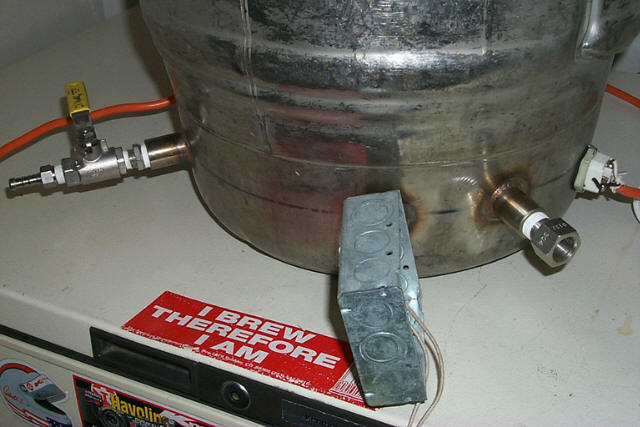 Here
you can see the drain, t-stat j-box, thermostat well and an exposed heater
element
Here
you can see the drain, t-stat j-box, thermostat well and an exposed heater
element
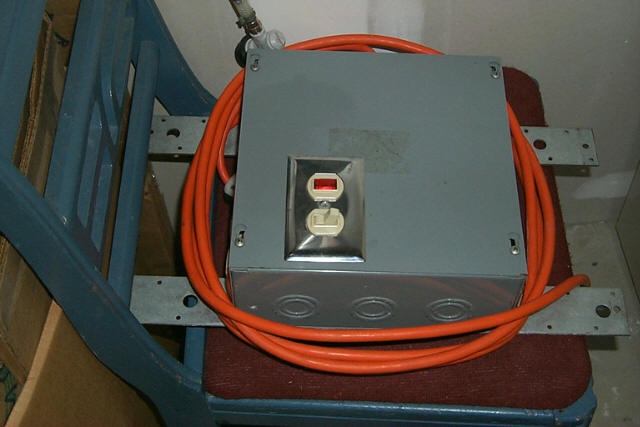 This
is the controller. A switch and a pilot light that comes on when the heat
is on. On the sides are where the t-stat and the elements plug into. This
mounts to my brew stand just under the hlt.
This
is the controller. A switch and a pilot light that comes on when the heat
is on. On the sides are where the t-stat and the elements plug into. This
mounts to my brew stand just under the hlt.
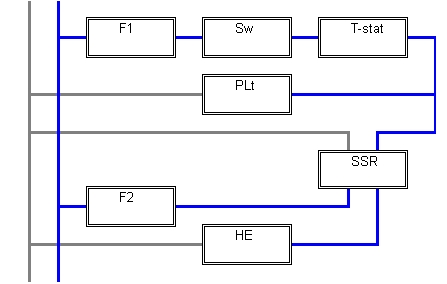 Here's the wiring diagram.
Blue is the hot wire and gray is neutral. It's really pretty simple. When
the switch is on and the t-stat calls for heat, the pilot light and relay
get power. When the relay gets power, the element gets power. The reason
for the relay is that t-stat can't handle a lot of amperage.
Here's the wiring diagram.
Blue is the hot wire and gray is neutral. It's really pretty simple. When
the switch is on and the t-stat calls for heat, the pilot light and relay
get power. When the relay gets power, the element gets power. The reason
for the relay is that t-stat can't handle a lot of amperage.
F1 - 2 amp fuse
F2 - 15 amp fuse
HE - heater element
PLt - pilot light
SSR - solid state relay
Sw - single pole switch
T-stat - thermostat